
Quick Watercolor Tip: Light vs. Dark Colors
To create light colors, such as light red, add more water and use less pigment. To create dark, rich colors, such as dark blue, use more pigment and less water. You can also mix in a tiny amount of black to darken a color, but use it sparingly—black can quickly overpower the original color and make it look muddy. Add a little at a time until you achieve the shade you want.
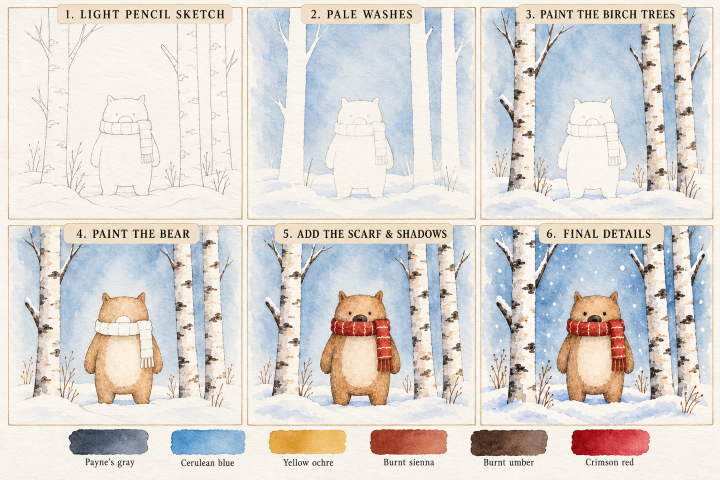
Here’s the six-step watercolor visual guide for your little bear in the snowy birch forest, following the same format as the Christmas tree tutorial.
Step-by-step painting instructions
- Light pencil sketch: Draw the birch trunks, snowbanks, bear, and scarf lightly. (Skip if you purchased one of our watercolor art kits)
- Pale washes: Paint the sky with diluted blue, leaving the birch trunks and snow white.
- Birch trees: Add soft gray and brown bark marks, then deepen selected dark patches with darker gray.
- Paint the bear: Layer yellow and brown, leaving the belly lighter. Add dark brown shadows around the sides and feet.
- Scarf and shadows: Paint the scarf red, then add darker red folds and light yellow stripes. Add cool blue shadows in the snow.
- Final details: Add the eyes, nose, fine branches, snowflakes, and a few dark accents on the bark.
Tip: Paint the background and birch trunks first, then the bear. Let each layer dry before adding darker details to keep the colors crisp.